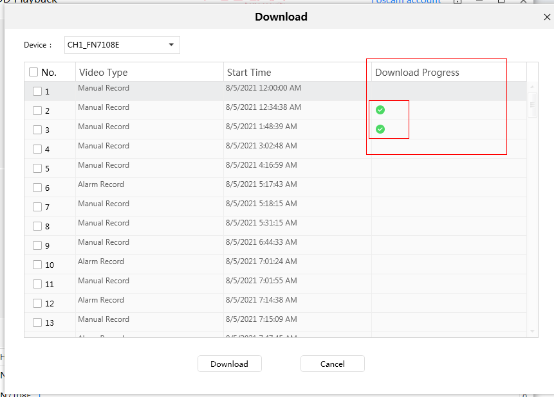
5)Click the Download icon for a list of files which are available for download. Choose the recordings that need to be downloaded.
6)Select the recordings to be archived to the computer using the check boxes located near each of the recordings. Once all of the files are selected click the Download button.
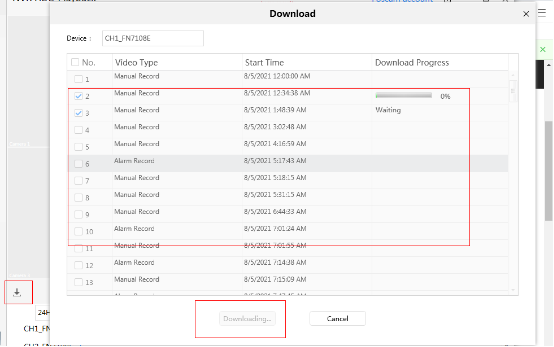

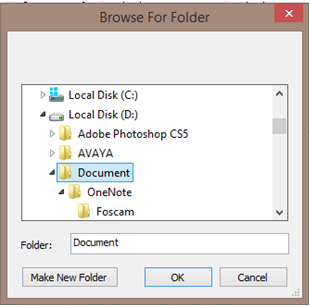
8)A window will open requesting the location of where to save the files; select the desired folder to save the videos. Note this for future access.
On PC browser:
Note: Disable any Pop Up Blocker software that may be running on the web browser. This will prevent the web browser from properly interfacing with the NVR system. If a Windows based computer is used and any virtualization software such as Oracle VirtualBox is installed be sure to disable the virtual network drivers that may be installed. They will interfere with the Equipment Search Tool software.
1)Launch the Equipment Search Tool to obtain the IP address of the NVR system.
2)Launch a web browser and type in the IP address provided by the Equipment Search Tool software.
3)Login to the NVR System
Method 1: Downloading the recordings using the NVR Web Interface
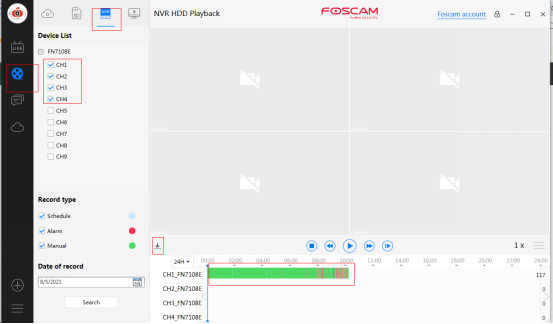
1)Click on the Playback tab.
2)Choose the Date and the type of recordings to search for from the drop-down menu.
3)Click on the Search button for the software to conduct a search and to view a graphical representation of the recordings present for that timeframe.
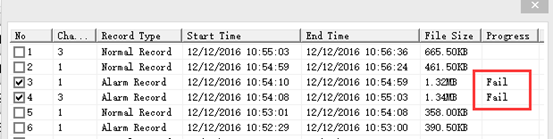
4)In the display below a red color indicates alarm triggered event recordings. The blue color indicates scheduled or user initiated manual recordings.
5)Click the Download icon for a list of files which are available for download. Choose the recordings that need to be downloaded.

6)Select the recordings to be archived to the computer using the check boxes located near each of the recordings. Once all of the files are selected click the Download button.
7)A window will open requesting the location of where to save the files; select the desired folder to save the videos. Note this for future access.
Note: While using Internet Explorer if the download fails to initiate add the NVR IP to the Trusted Zone. Once the IP address is added Save the settings, close Internet Explorer, re-launch the browser and attempt to download the files again.
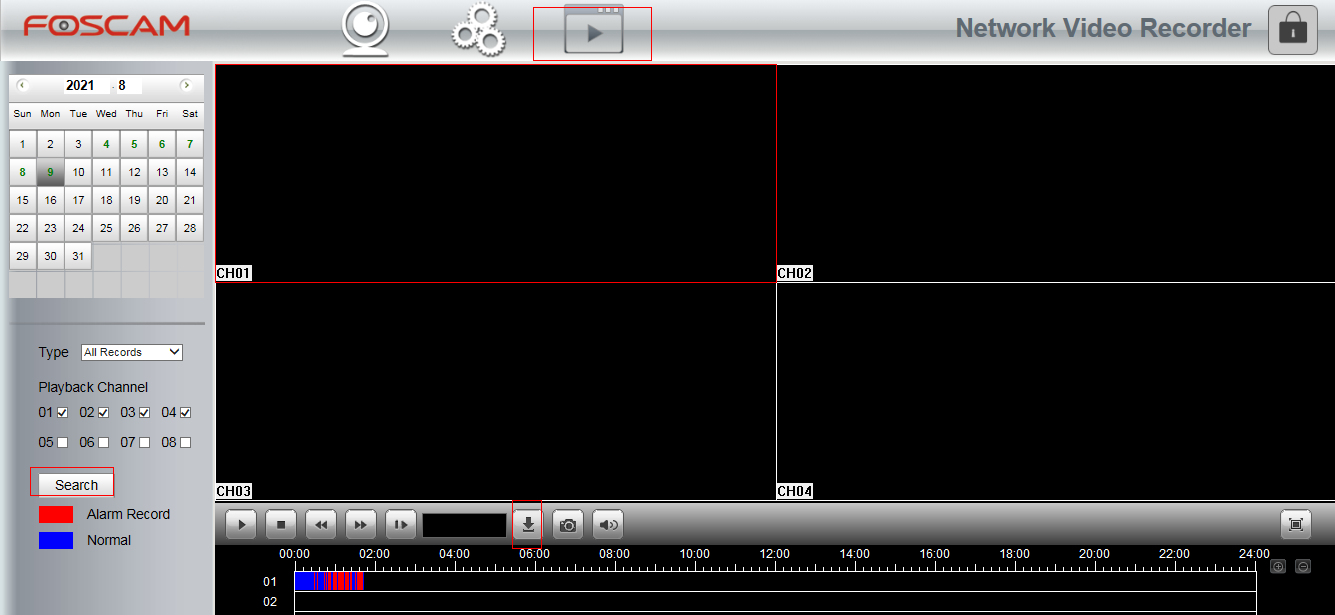
Method 2: Backup the recordings using a monitor, keyboard and mouse connected directly to the NVR system.
1)Navigate to Menu → Backup using the GUI interface of the NVR.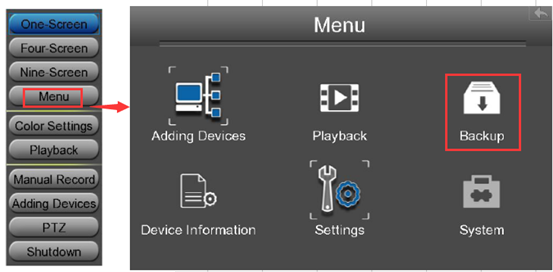

Was this article helpful?
Contact information
Full name *
Email *
Telephone number
Camera model
Help Topic *
Ticket Details
Please describe your problem as detailed as possible so that we can assist you in the best possible way
Title *
Submit