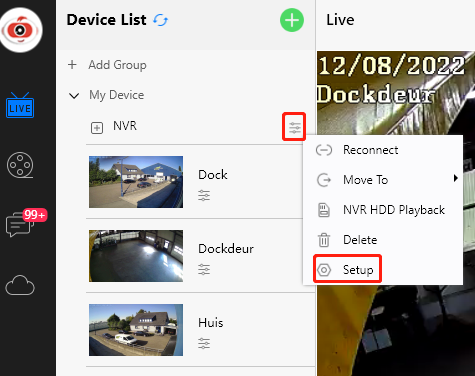
6)Set the detection area for the camera. (The area to be viewed/monitored by the camera to detect motion.)
7)Set the detection scheduled timeframe for the system to monitor for movement. The selected timeframe for monitoring is the area colored red.
8)Once the timeframe is set click the Save button to save the configuration information to the NVR.
On PC browser:
tips: only few old NVR can support browser.
Note: Please be sure to disable any Pop Up Blockers which may be installed and running on the web browser.
1)Login to the NVR system via a web browser installed on the computer which is to be used to playback the videos.
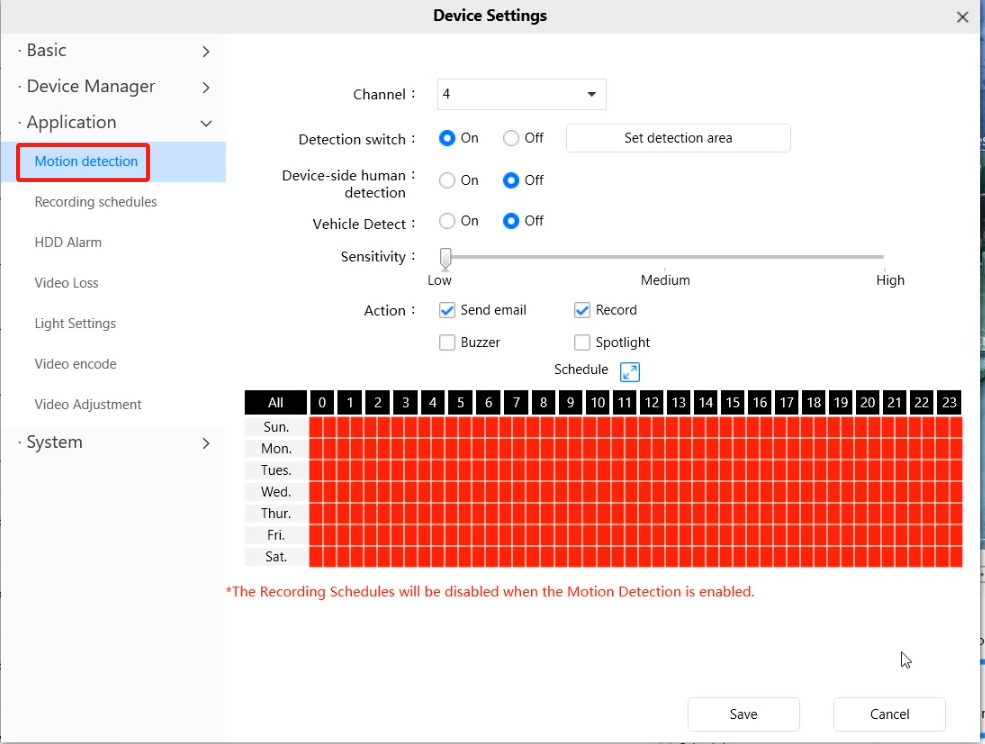
2)Click on the Playback tab.
3)Choose the date and time of the recordings.
4)Clicking the Search button will assist in finding the recordings on the NVR.
5)A red color indicates alarm triggered recordings.
6)A blue color indicates the normally scheduled recordings.
7)Select the start time of the recording you would like to playback. Click on the play button to view the recordings.

This method uses a monitor and mouse directly connected to the NVR System.
For new NVR (Here we take FN9108H NVR as an example).
Step1:
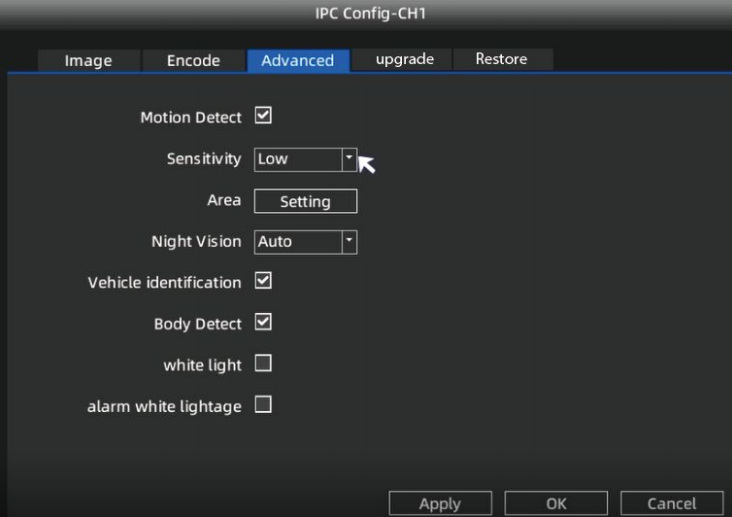
Hover your mouse over the camera you want to set up, right-click in live view mode-->IPC Config-->Advanced. Enable Motion Detection and set sensitivity then click ok.
Step2:
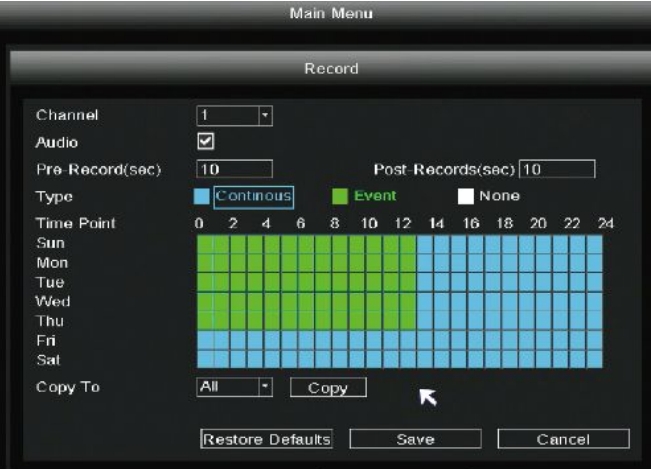
Go back to live video mode, right-click → Main Menu → Record → choose recording channel.
Select Event in Type(left click Event field rather than the color square), use the left mouse button to select the time (turned to green), then click save.
For old NVR (Here we take FN7108HE NVR as an example).
1)Directly login to the NVR by using the monitor and following the on-screen prompts.
Was this article helpful?
Contact information
Full name *
Email *
Telephone number
Camera model
Help Topic *
Ticket Details
Please describe your problem as detailed as possible so that we can assist you in the best possible way
Title *
Submit