Overview: This article will introduce the steps to access Foscam NVR remotely with 3rd party DDNS and Port from web browser(IE) and Foscam VMS.
From web browser(IE):
Step1: Please login the Foscam NVR web page on computer.
Step2: Please go to Settings-->Basic Settings-->Network to change the Network Type to "Static IP" and set a proper number(not 80 or 88) as HTTP Port.
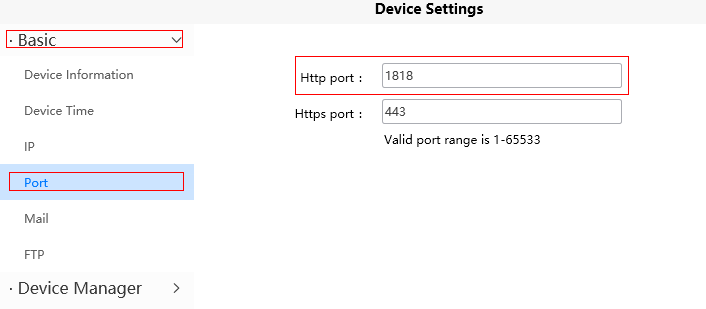
It is suggested to use the number between 1000 to 65535. Here we set the NVR IP address to 192.168.1.4 and http port to 1818.
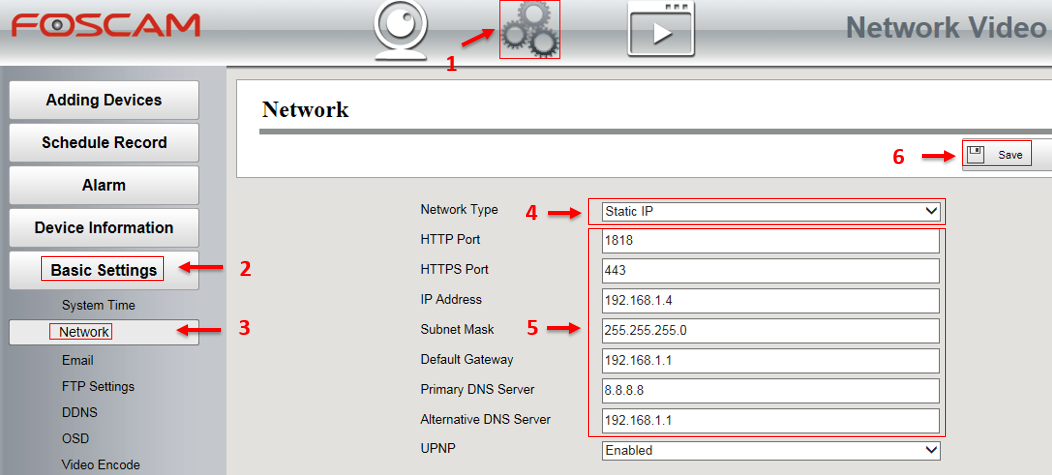
Step2: Go to Basic Settings-->DDNS to enable the option and input the 3rd party DDNS information. There is need for you to register a 3rd party DDNS in advance.

Step4: Please login your router to do the port forwarding for the NVR. Here we take the Netgear router as the example for port forwarding.
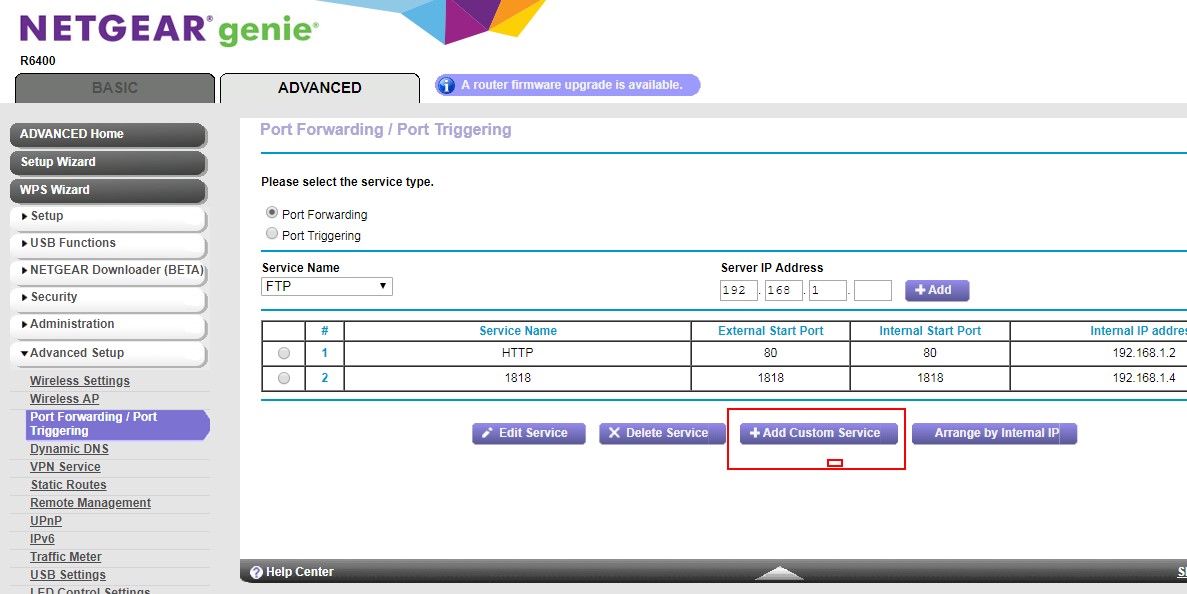
1)Login the router and go to Advanced Settings-->Port Forwarding page to add a Custom Service:
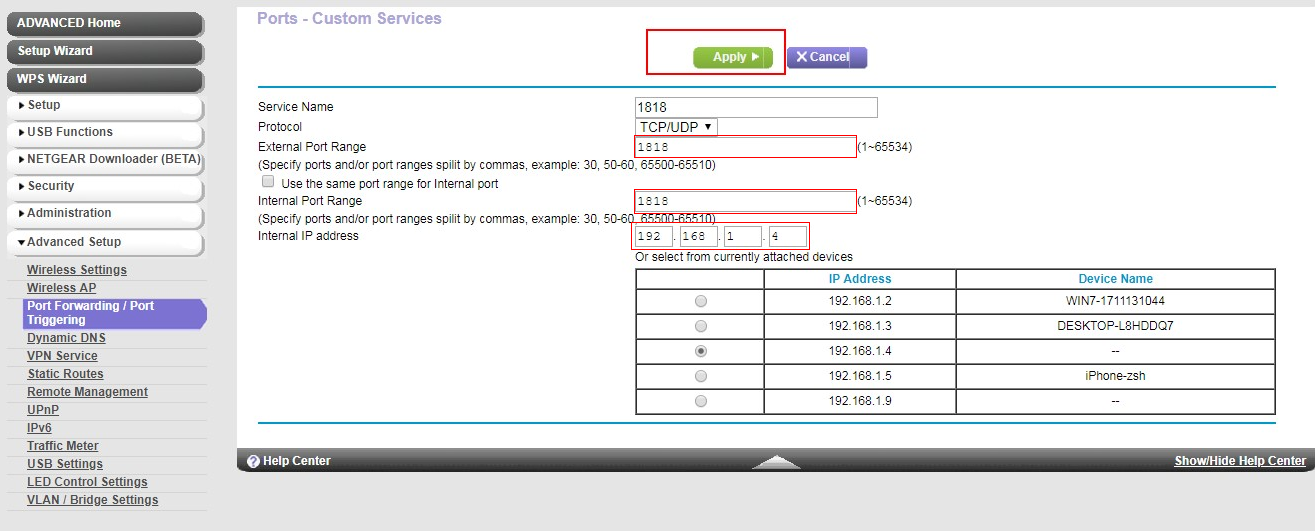
2)Then please input the NVR's http port (1818) to the "External Port Range" box and "Internal Port Range" box, then input the NVR's IP address (192.168.1.4) to the "Internal IP address". At last, click "Apply" button to save above settings.
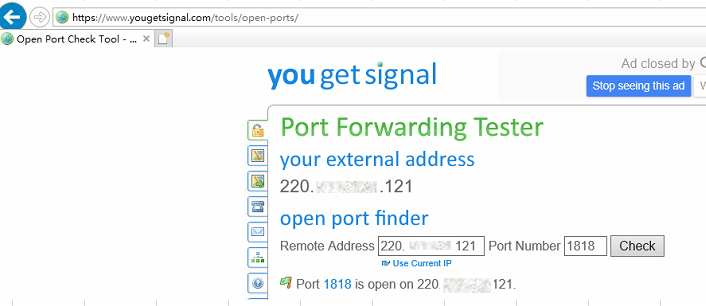
Step5: Then go to https://www.yougetsignal.com/tools/open-ports/to check if your NVR http port is opened or not.
Step6: If opened, you can login the NVR remotely by the 3rd party DDNS and port from the web browser like below.
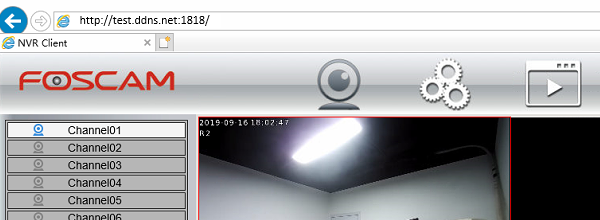
If you are not familiar with how to do port forwarding, please refer to here.
From Foscam VMS:
Step1: Add the NVR to the Foscam VMS and get into the NVR Device Settings.
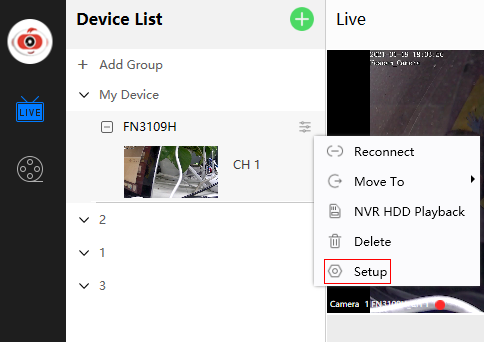
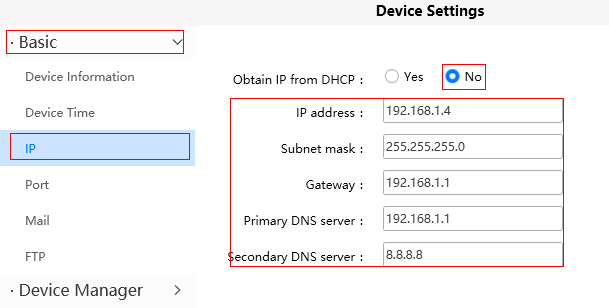
Step2: Go to Basic-->IP and Port to disable the DHCP and set up the static IP address and http port for the NVR.
Step3: Go to DDNS to enable the option and input the 3rd party DDNS information. There is need for you to register a 3rd party DDNS in advance.
Step4: Please login your router to do the port forwarding for the NVR. Here we take the Netgear router as the example for port forwarding.
1)Login the router and go to Advanced Settings-->Port Forwarding page to add a Custom Service:

2)Then please input the NVR's http port (1818) to the "External Port Range" box and "Internal Port Range" box, then input the NVR's IP address (192.168.1.4) to the "Internal IP address". At last, click "Apply" button to save above settings.

Step5: Then go to https://www.yougetsignal.com/tools/open-ports/ to check if your NVR http port is opened or not.

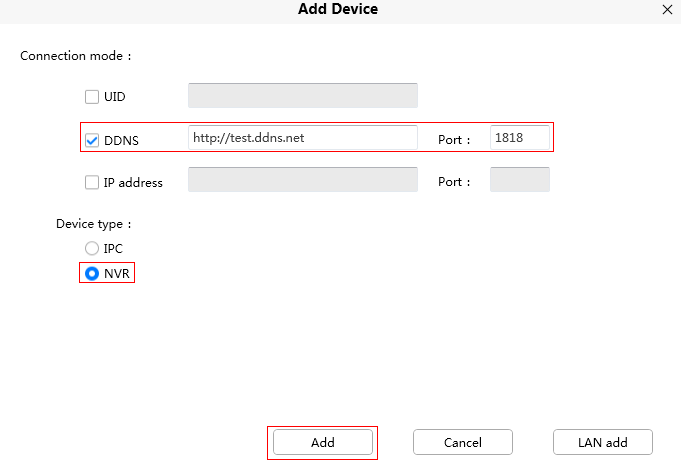
Step6: If opened, please go to Add Device on Foscam VMS and input the required information to add NVR by 3rd party DDNS and port. After that, you will be able
to login the NVR remotely by 3rd party DDNS and port from the Foscam VMS.
Was this article helpful?