How to connect a Foscam HD Camera to a wireless router?
Overview: This article will introduce the procedure to connect a Foscam HD Camera to a wireless router from Foscam VMS or web browser.
Technical Note: Be sure the camera is plugged in via an Ethernet cable to the same router the computer is connected to. Step 1: Login the camera from Foscam VMS or web browser.
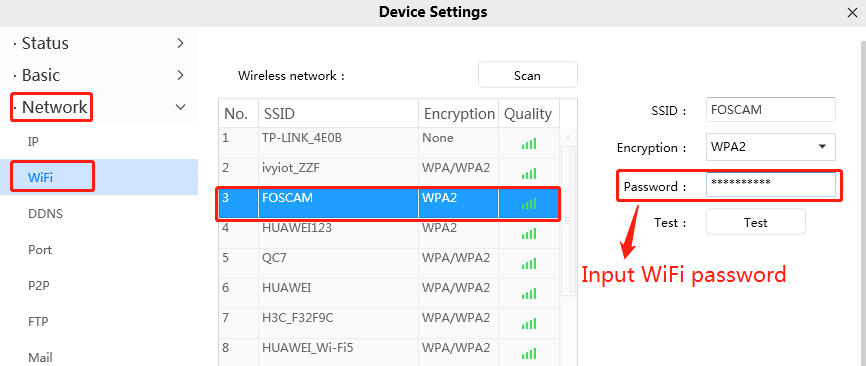
Step 2: Go to Settings--> Network--> WiFi to configure the wireless connection.
On Foscam VMS:
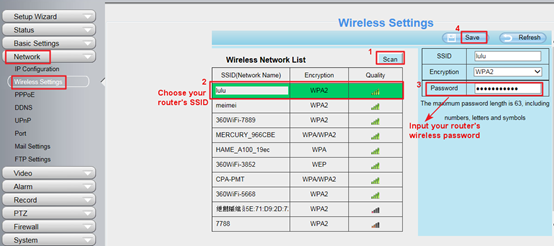
On Web browser:
1) Click the “Scan” button to have the camera search the area for WiFi network signals.
2) Once the WiFi SSID are listed, select the correct SSID of the network the camera is supposed to be connected to.
3) Input the WiFi password in the “Password” section and click on the “Save” button in order to save the configuration to the camera. Step 3: Disconnect the ethernet cable from the camera and check if the camera live video can be seen on Foscam VMS or web browser.