This article will introduce the situation of a camera being successfully added to the Foscam Client and no video feed is displayed. This article contains several reasons and solutions to assist in resolving this.
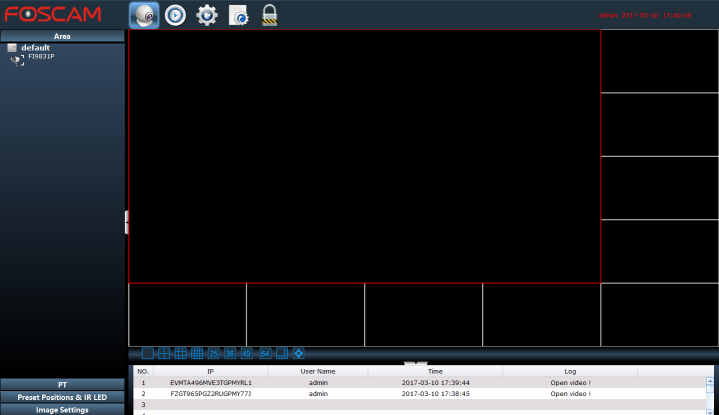
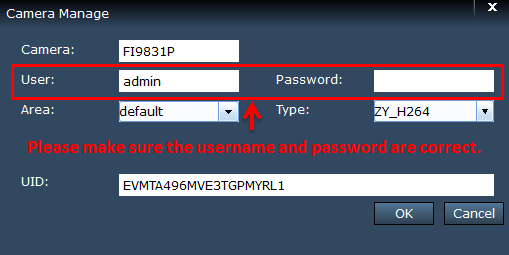
Reason 1: Errors with the username and password
At some point in time the username and/or password were changed elsewhere on the connected camera and the information was not updated in the Foscam Client software. The software is using the incorrect login information and is attempting to access the camera and is being denied the login because of this. The other most common mistake is that the username and/or password were mistyped when configuring the camera.
Solution: Re-type the correct username and password for the camera that is being affected.
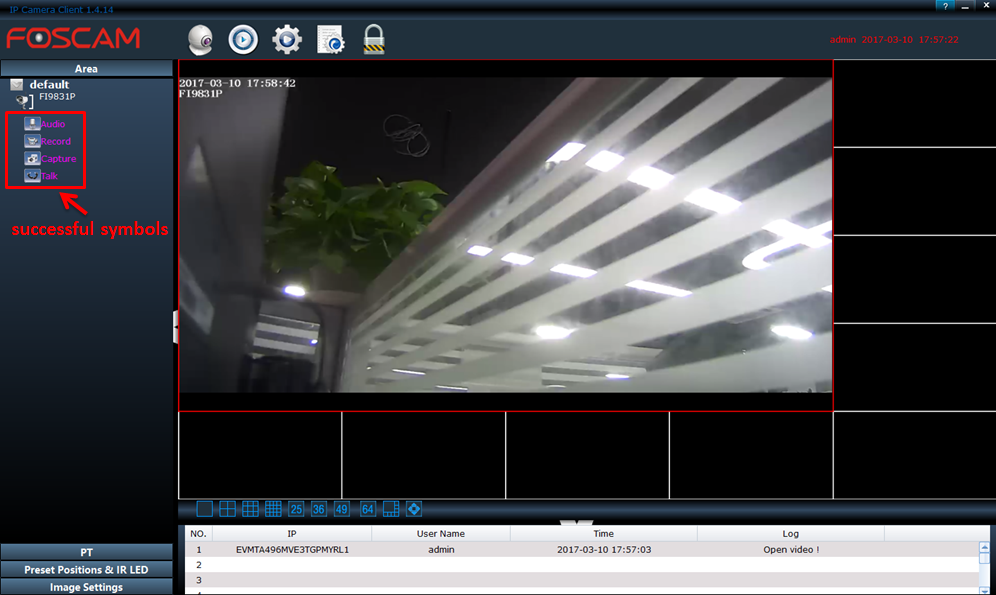
Reason2: The “Connect” button was not clicked after the camera was successfully added and configured in the software.
Solution: After completing the process of adding the camera return to the Live Video Page and select the drop-down menu for cameras. Select the recently added camera to view the video feed.
Note: After a camera has been successfully added and recognized by the software buttons for Audio, Talk, Record and Capture appear underneath the camera when the software is communicating with the camera.
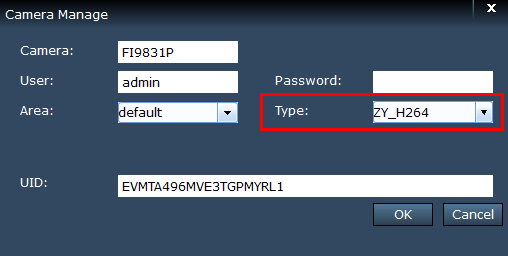
Reason3: The wrong type of camera was selected while adding the camera’s information to the Client Software
Solution: Verify that the option ZY_H264 was selected for HD cameras or MJPEG was selected for SD cameras.
Reason4: An older version of the Foscam Client software is currently installed on the “C” drive of the computer and was not uninstalled. The version number 1.4.13 or earlier has a folder installed interfering with the current software.
Solution: Please delete that older Foscam client from your computer and install the newest Foscam client 1.4.14.

Reason 5: While configuring the Client Software for remote access the LAN IP address of the camera was entered instead of the WAN IP or DDNS.
Solution: Input the correct WAN IP or DDNS when configuring the Client Software to access the camera remotely. Verify that the camera is already setup with remote access settings and that the settings are accurate.
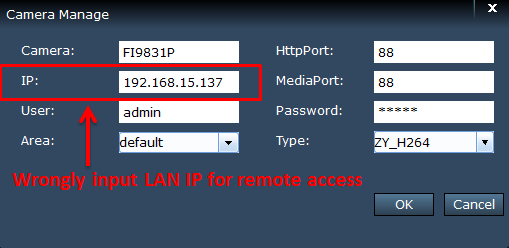
Note: If the configuration of the camera is via a P2P connection on a LAN attempt to delete the camera and manually add it again using the LAN IP.
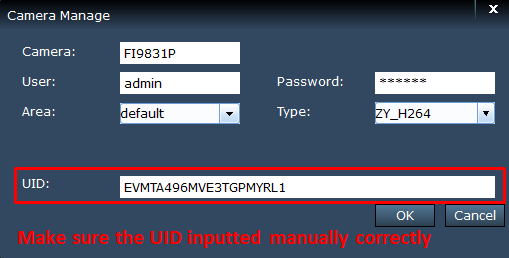
Reason 6: The wrong UID for the camera was entered when attempting to add the camera manually.
Solution: Verify the UID of the camera against what is configured in the Client Software and correct it if necessary.
Was this article helpful?