This article will introduce how to set up the preset and cruise tracks on a pan and tilt (PT) HD camera.
On Foscam VMS:
Step 1: Setting Preset Points (Optional)
Navigate to the Live Video Interface and click on Preset.
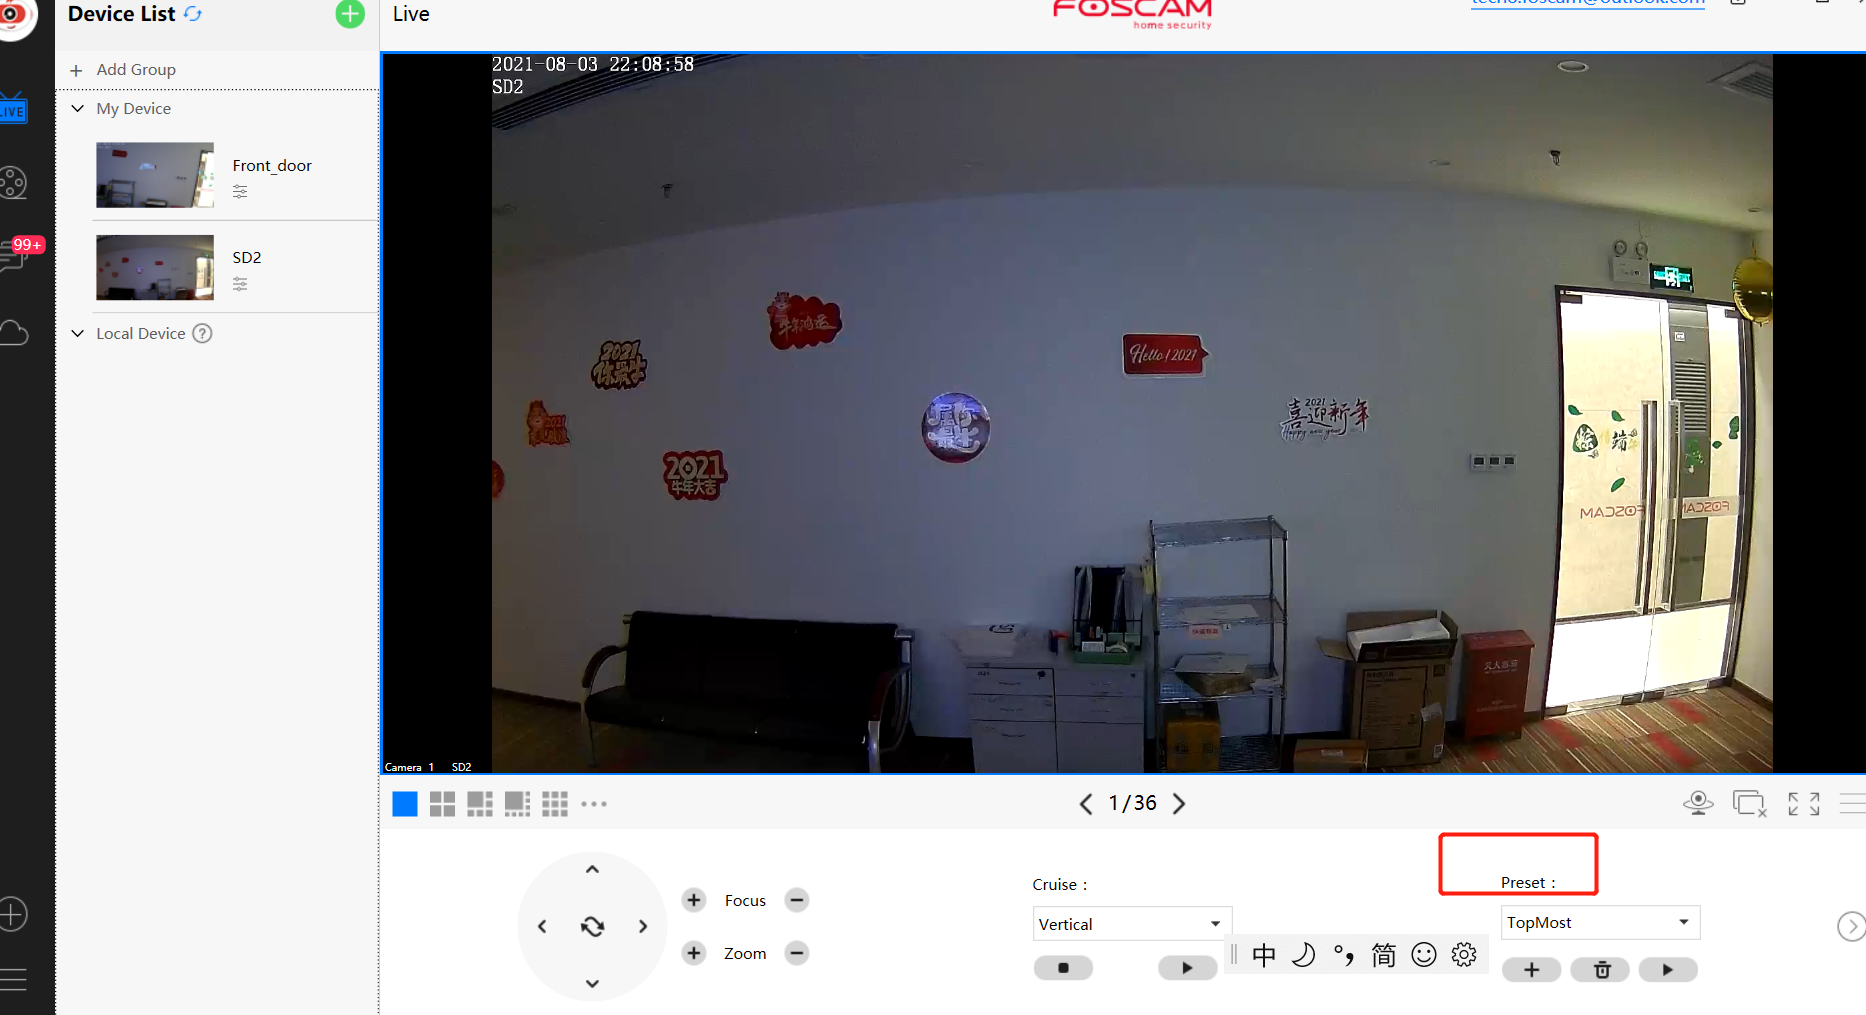
1) Pan and tilt the camera to the desired position to be assigned to the camera.
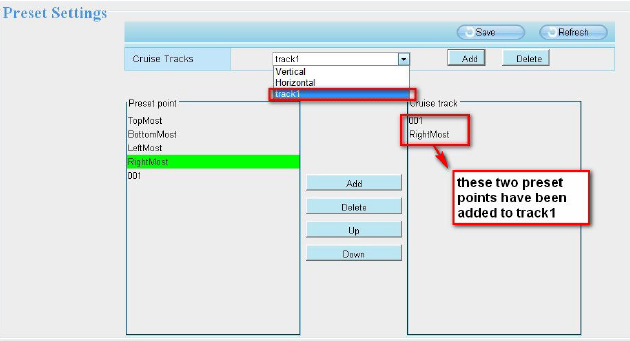
2) Click the + icon and name the position / example: 001Firstly, Navigate to the Preset Settings interface window. Click the Add button and enter a name to describe the cruise track / example: Track 01 / Track 02
Secondly, select the preset point(s) from the left box where all the current cruise presets are listed and click the add button. Preset points will be added to the Cruise track box on the right side of the window
Thirdly, click the Save button to add the cruise set to the list in the drop-down menu. This indicates the Cruise Track will now take effect..
Note: In the above example two presets were added under Track1, 001 and RightMost. When Track1 is selected from the surveillance window the movement of the camera will be on the following track: The camera will navigate to 001, then navigate to Rightmost.
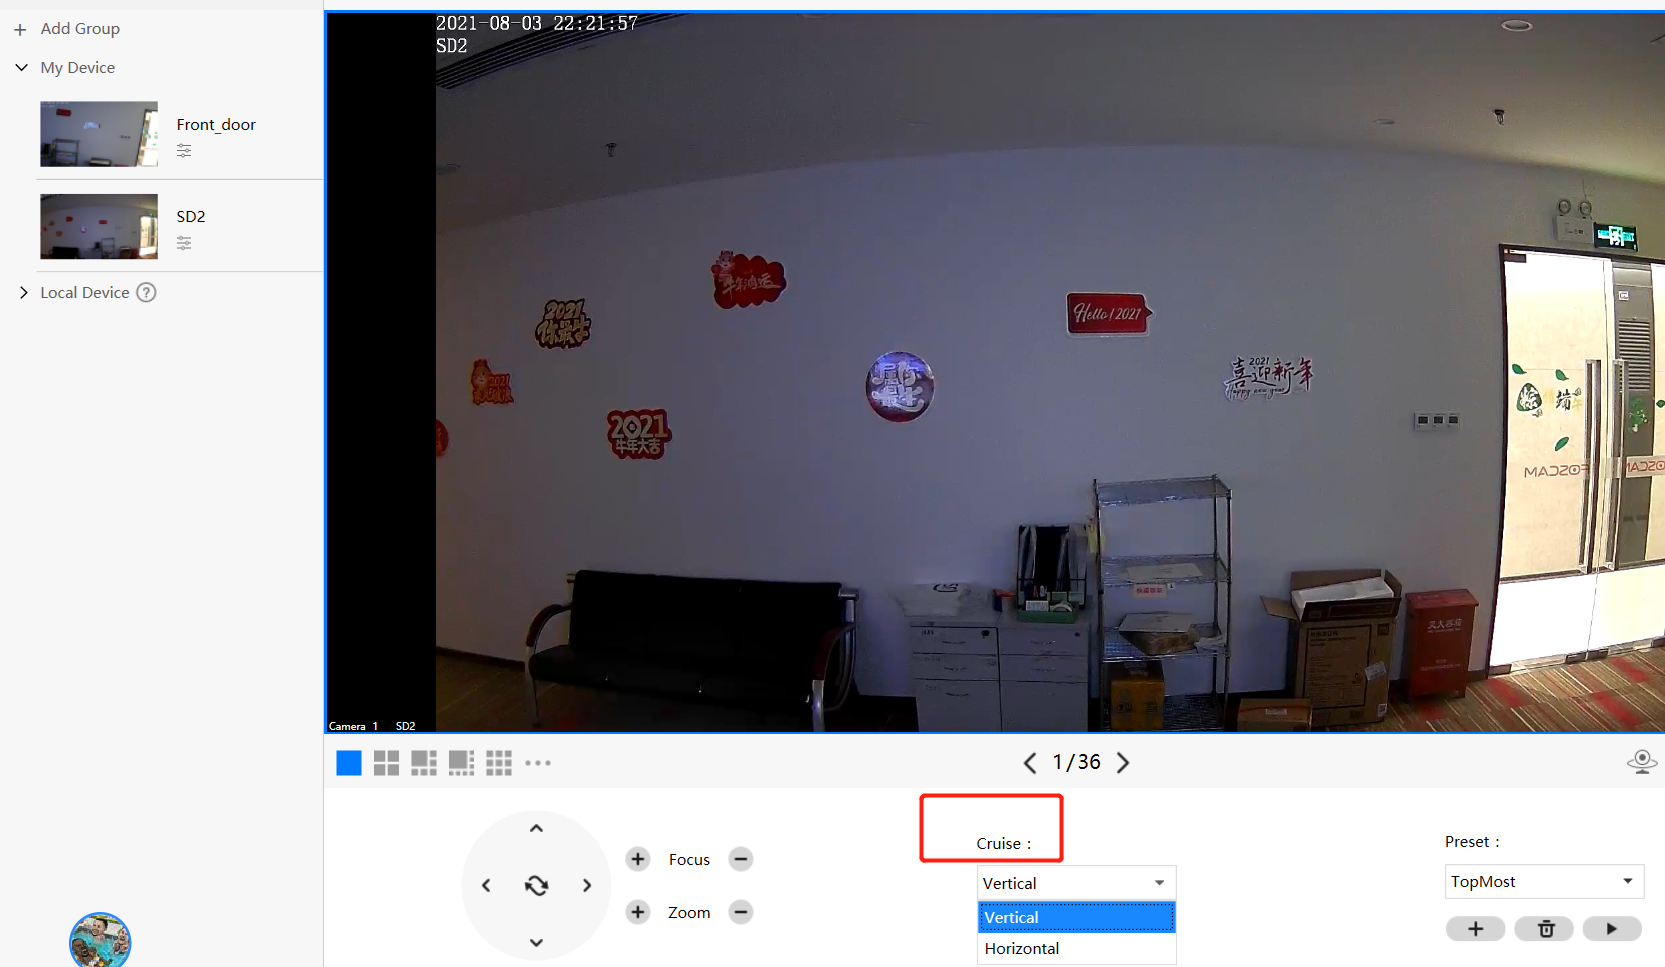
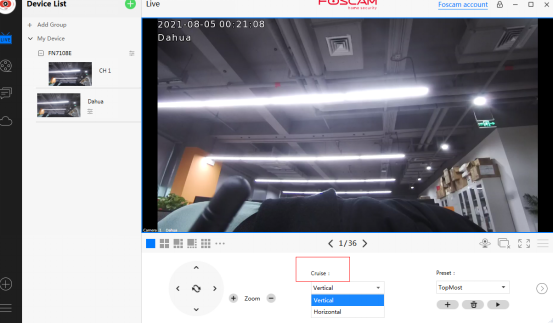
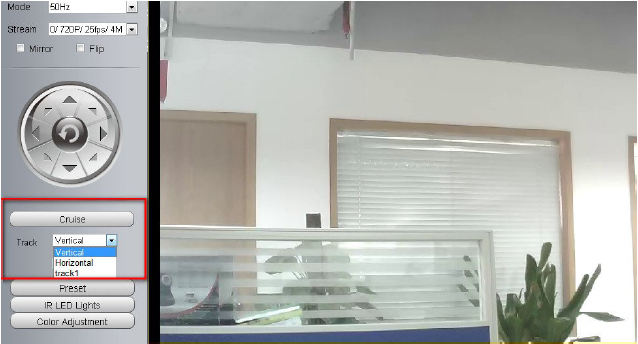
Returning to the monitoring interface window and accessing the drop-down menu near Track reveals the newly added Cruise Tracks.
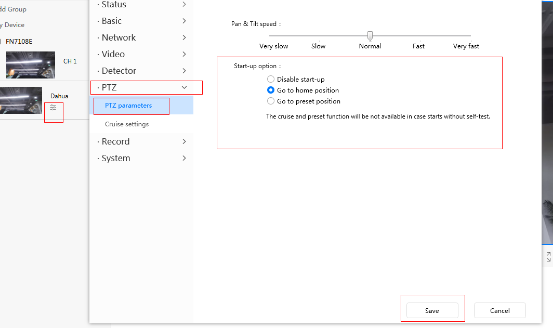
3. Start-Up Options
Three
Start Up Options are available on the camera. They are
1) Do not PT after power on. (no camera movement after power is applied to
the camera or it is reset)
2) PT and stop in the center after power on.(Choosing the Go To Home
Position will navigate the camera automatically then it will return to the home
position.)
3) PT to the preset point you set. (Choosing Go to Preset Position will position
the camera to a preset position selected by the end user.)
Note: The camera supports a maximum of 16 preset points and 8 cruise tracks including the default ones.
On PC browser:
Note: Please login to the camera using a web browser before attempting the steps below.
Step 1: Setting Preset Points (Optional)
Navigate to the Live Video Interface and click on Preset.
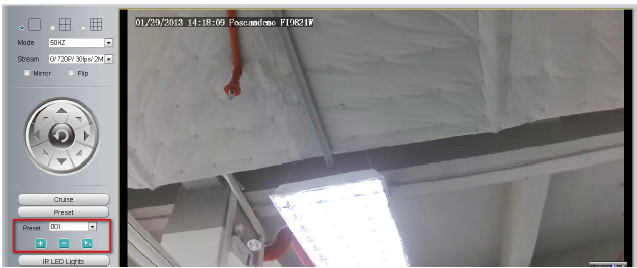
1) Pan and tilt the camera to the desired position to be assigned to the camera.
2) Click the + icon and name the position / example: 001
3) From this point forward position “001” can be access from the Preset List. (A maximum of 12 presets can be assigned to the camera.)
4) The – icon can be selected to delete a preset point.
Click ‘—‘ icon to delete the preset point.
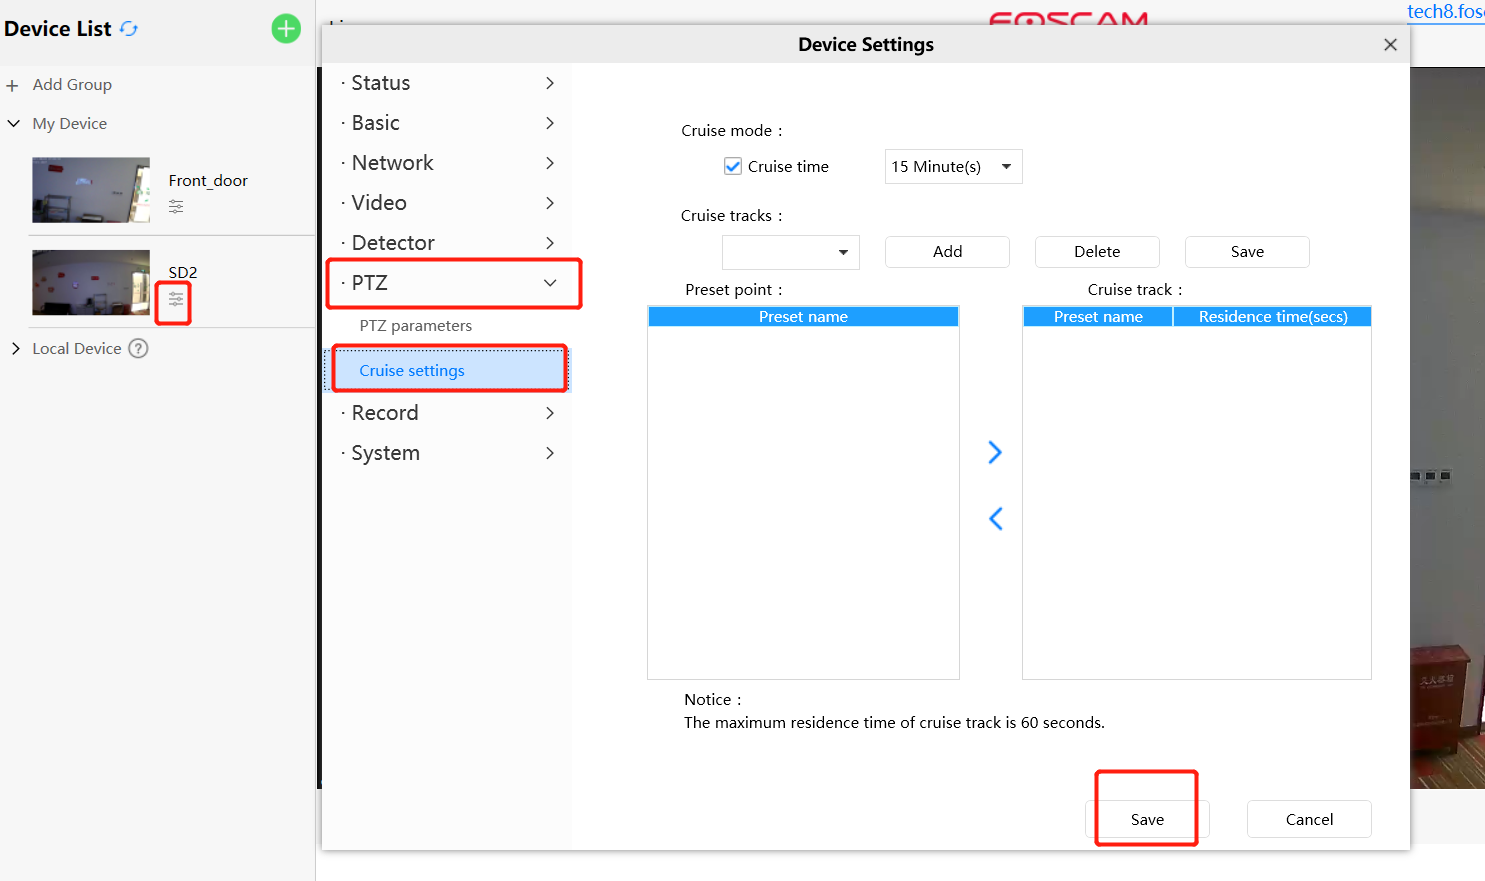
2. Setting Custom Cruise Tracks (Optional)
Firstly, Navigate to the Preset Settings interface window. Click the Add button and enter a name to describe the cruise track / example: Track 01 / Track 02.
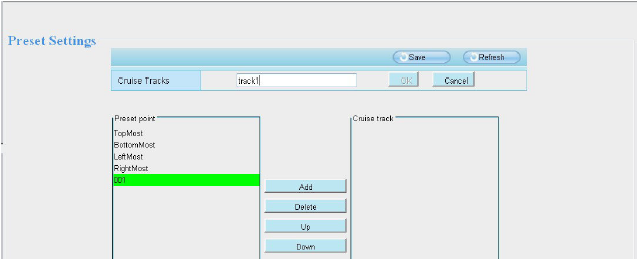
Secondly, select the preset point(s) from the left box where all the current cruise presets are listed and click the add button. Preset points will be added to the Cruise track box on the right side of the window.
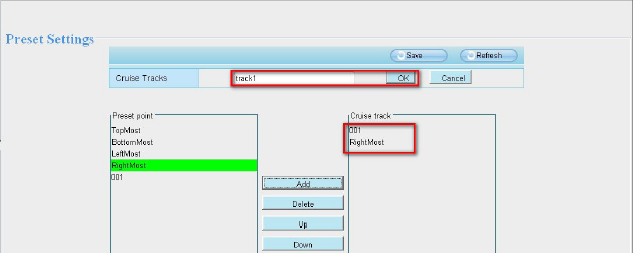
Thirdly, click the Save button to add the cruise set to the list in the drop-down menu. This indicates the Cruise Track will now take effect.
Note: In the above example two presets were added under Track1, 001 and RightMost. When Track1 is selected from the surveillance window the movement of the camera will be on the following track: The camera will navigate to 001, then navigate to Rightmost.
Returning to the monitoring interface window and accessing the drop-down menu near Track reveals the newly added Cruise Tracks.
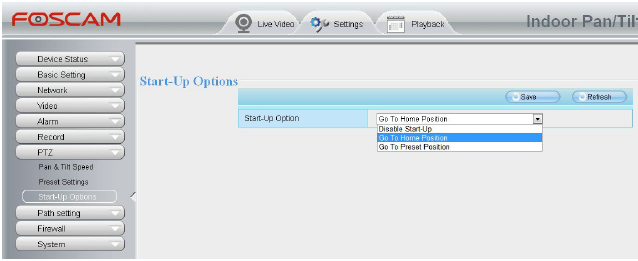
3. Start-Up Options
Three Start Up Options are available on the camera.
1) Do not PT after power on. (no camera movement after power is applied to the camera or it is reset)
2) PT and stop in the center after power on.(Choosing the Go To Home Position will navigate the camera automatically then it will return to the home position.)
3) PT to the preset point you set. (Choosing Go to Preset Position will position the camera to a preset position selected by the end user.)
Note: The camera supports a maximum of 16 preset points and 8 cruise tracks including the default ones.
Was this article helpful?
Contact information
Full name *
Email *
Telephone number
Camera model
Help Topic *
Ticket Details
Please describe your problem as detailed as possible so that we can assist you in the best possible way
Title *
Submit